Zlick has one of the fastest setup times in the industry – our record time for getting everything ready for payments is 6 minutes and 35 seconds. Can you do it faster?
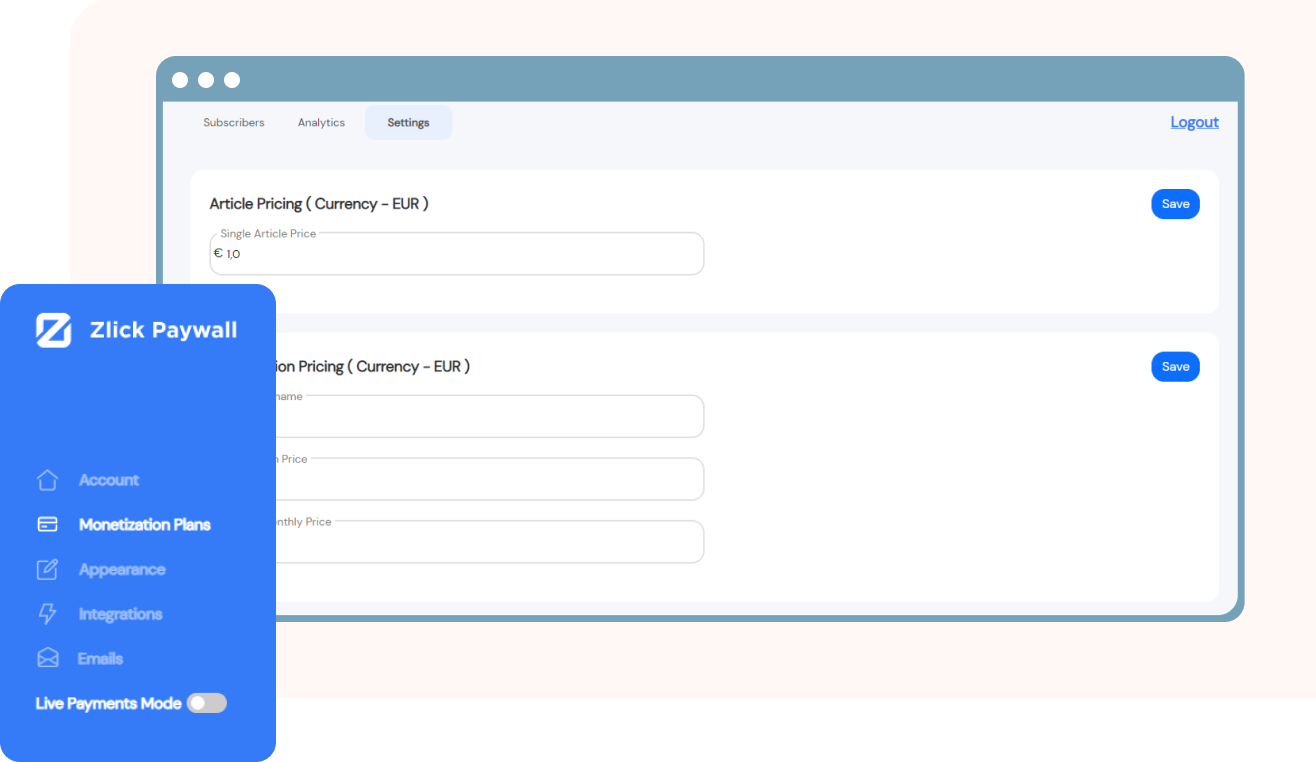
Add a name for your subscription. It will be displayed on the paywall widget as well as transaction statements. Choose a name that is clear and connected with your business.
Subscription pricing is on a monthly basis, single article price is for one time purchases.
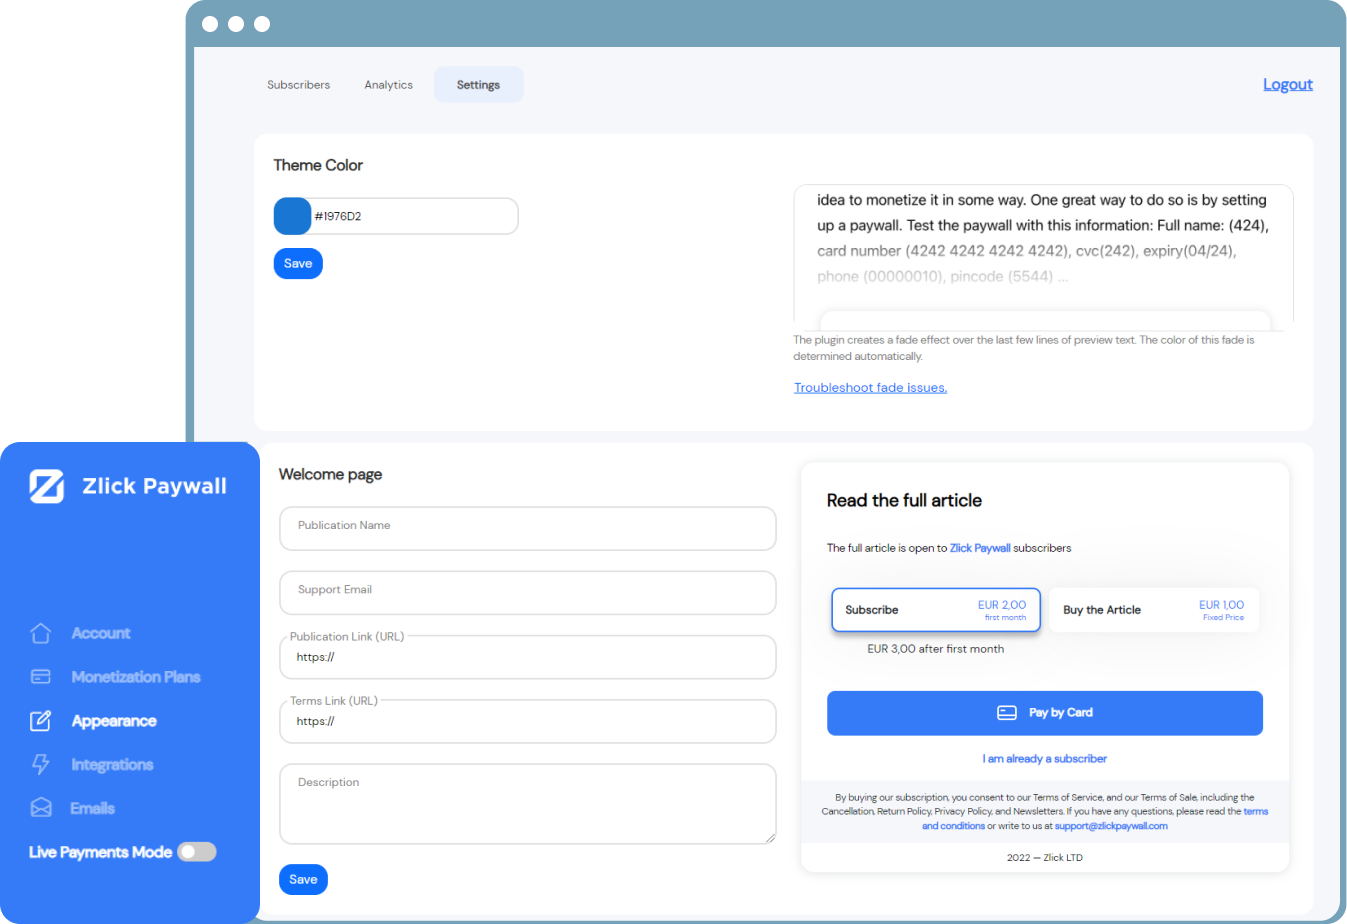
Go to Settings → Appearance in Zlick to personalize the paywall widget (the one that your customers will interact with) with your brand identity: change colors, customize texts, provide a link to your terms and conditions.

In WordPress, navigate to Plugins → Add new
Search for Zlick
Install and then activate the Zlick Paywall plugin
After activation, access it from the menu on the left (Settings → Zlick)
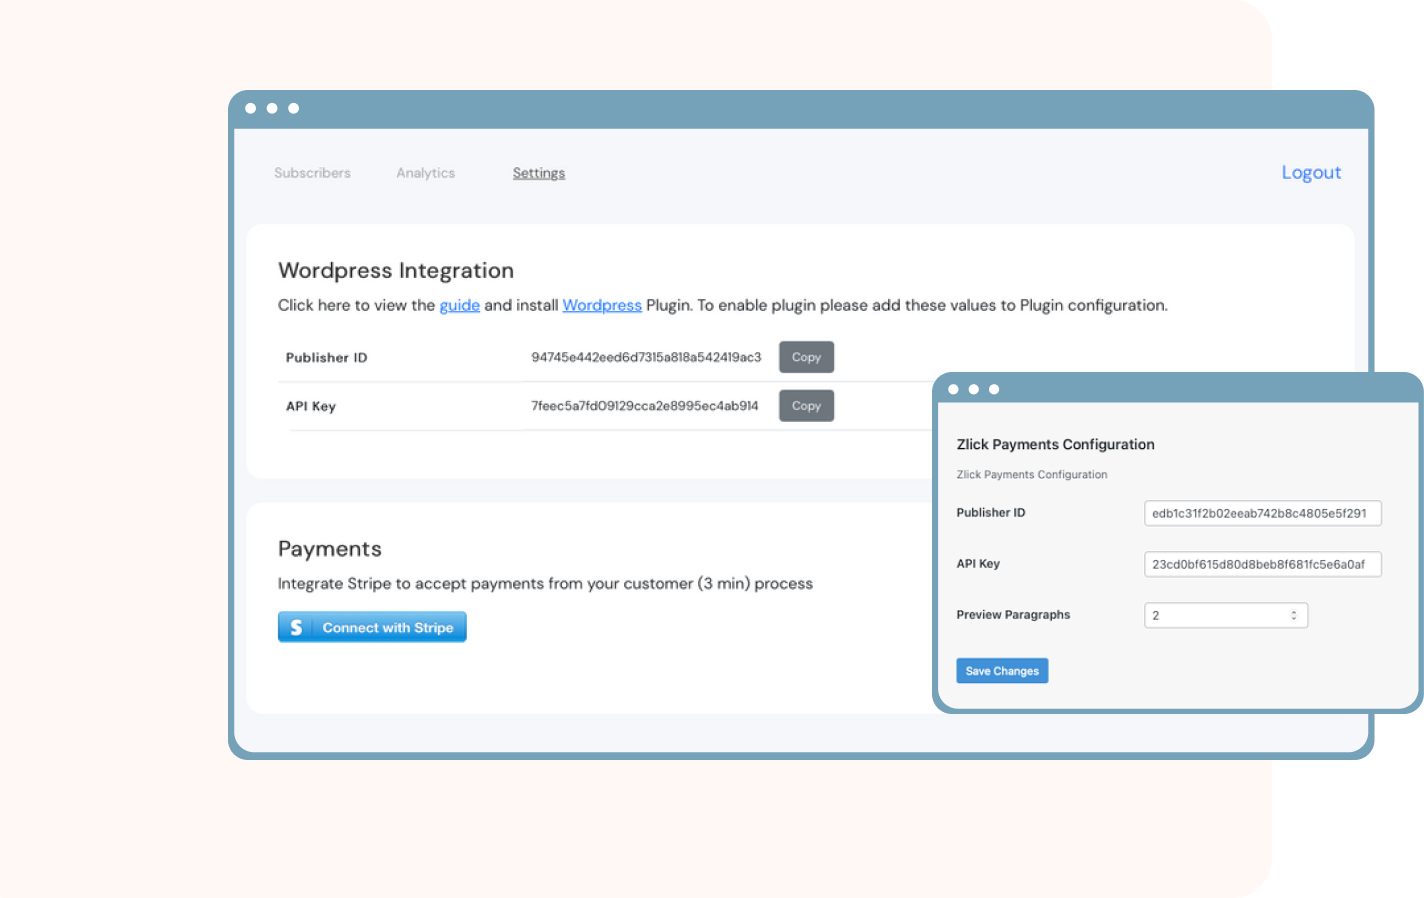
**You might as well configure your paywall while in there. Preview Paragraphs is the number of paragraphs a visitor can read before the paywall widget is shown. Search Engine Indexing is enabled by default but you can turn it off here if you wish.
Go to Settings → Integrations in Zlick
Copy Publisher ID
Navigate to Settings → Zlick in WordPress
Paste the value there
Save
**You might as well configure your paywall while in there. Preview Paragraphs is the number of paragraphs a visitor can read before the paywall widget is shown. Search Engine Indexing is enabled by default but you can turn it off here if you wish.
Go to Settings → Integrations in Zlick
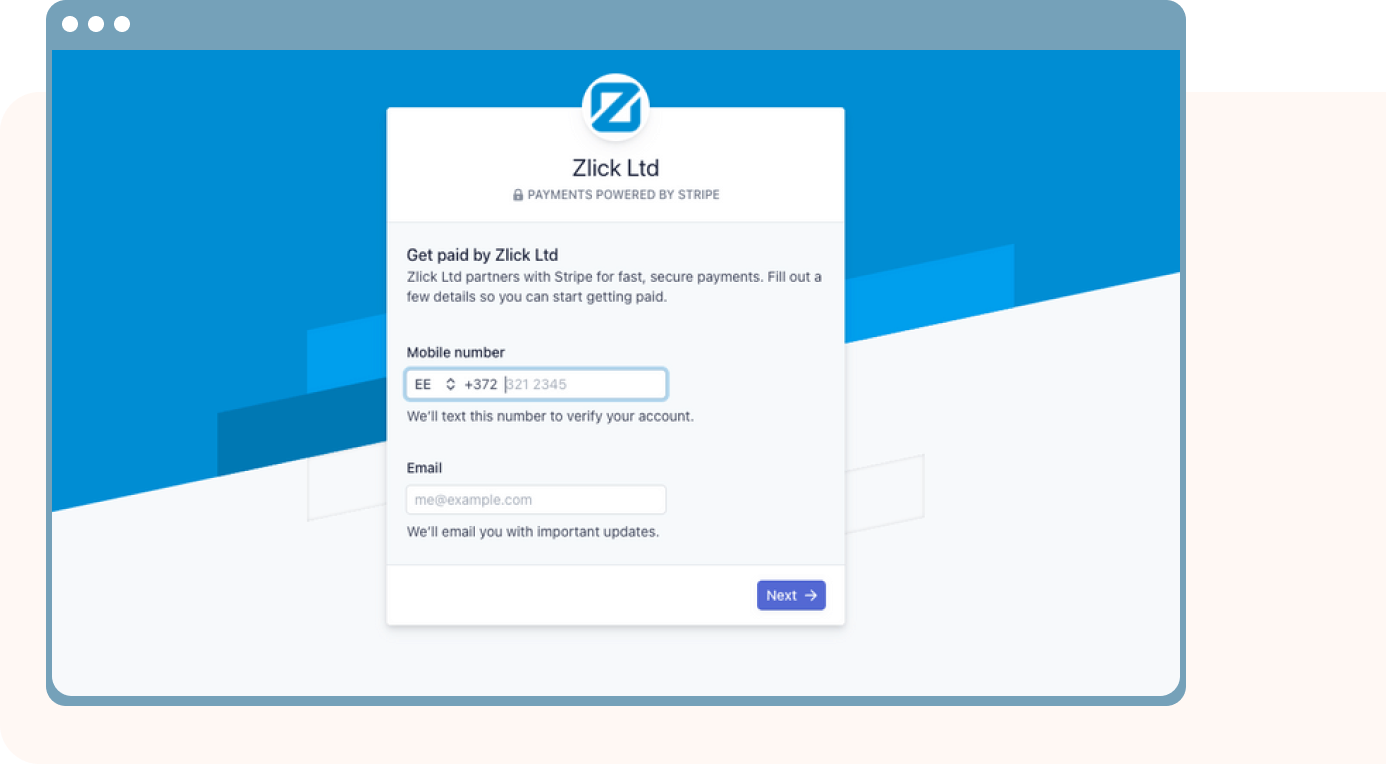
Click on Connect with Stripe button
You will be taken through their 4-minute registration process after which you’ll be ready for transactions
**Connecting with Stripe is 100% trusted and safe. They are the largest and most used platform for online transactions globally and that’s why we use them.
**Connecting with Stripe is 100% trusted and safe. They are the largest and most used platform for online transactions globally and that’s why we use them.

**You can also bulk edit the premium status of the articles, e.g. if you want to monetize hundreds of articles at once. Go to the “Posts” page and use the WordPress’ bulk edit tool to mark the required articles as paid or free.
Scroll down and find the Zlick Settings area
**You can also bulk edit the premium status of the articles, e.g. if you want to monetize hundreds of articles at once. Go to the “Posts” page and use the WordPress’ bulk edit tool to mark the required articles as paid or free.
In Test Payments mode you can test with test credit card data: Name: any; Card number 4242 4242 4242 4242; CVC 242; Expiry 04/24.
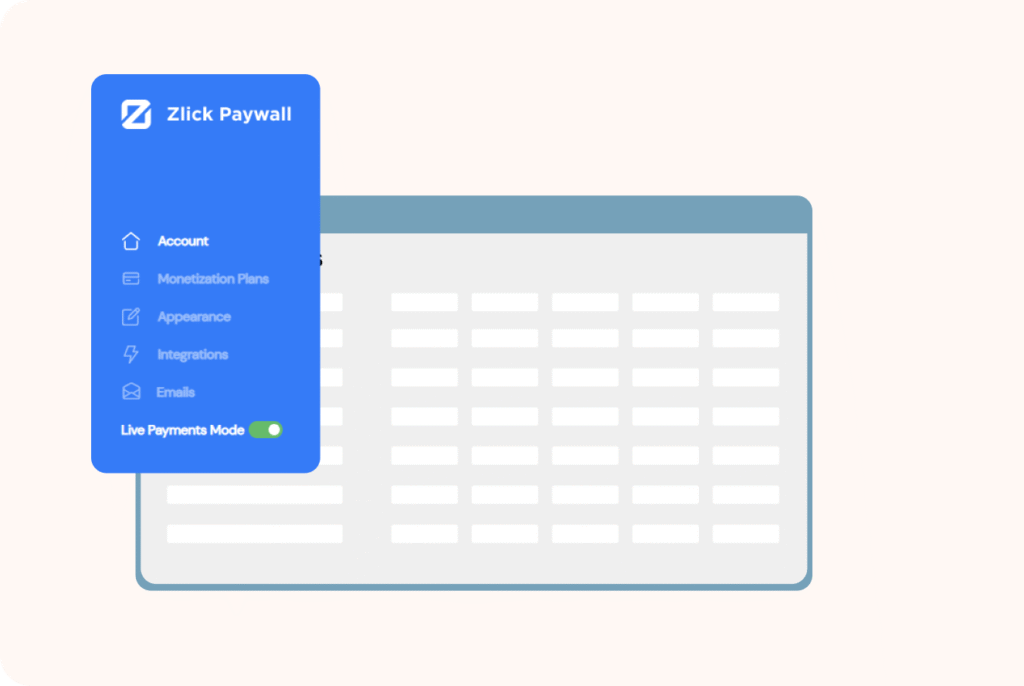
Once you are ready for Live payments:
Find the Live Payment Mode button from the Settings
Flick it on and you are ready to accept real money.
In Test Payments mode you can test with test credit card data: Name: any; Card number 4242 4242 4242 4242; CVC 242; Expiry 04/24.
Once you are ready for Live payments:

**You can also bulk edit the premium status of the articles, e.g. if you want to monetize hundreds of articles at once. Go to the “Posts” page and use the WordPress’ bulk edit tool to mark the required articles as paid or free.
This only applies to you if you are using a cache plugin to speed up your site. A cache plugin could load a cached version of your content bringing issues for the paywall. Luckily, there’s a really quick fix for this.
To make sure no other conflict happens, follow the instructions in this article
In WordPress, go to your cache plugin and purge/delete cache
*No credit card required