Zlick has one of the fastest setup times in the industry – our record time for getting everything ready for payments is 6 minutes and 35 seconds. Can you do it faster?
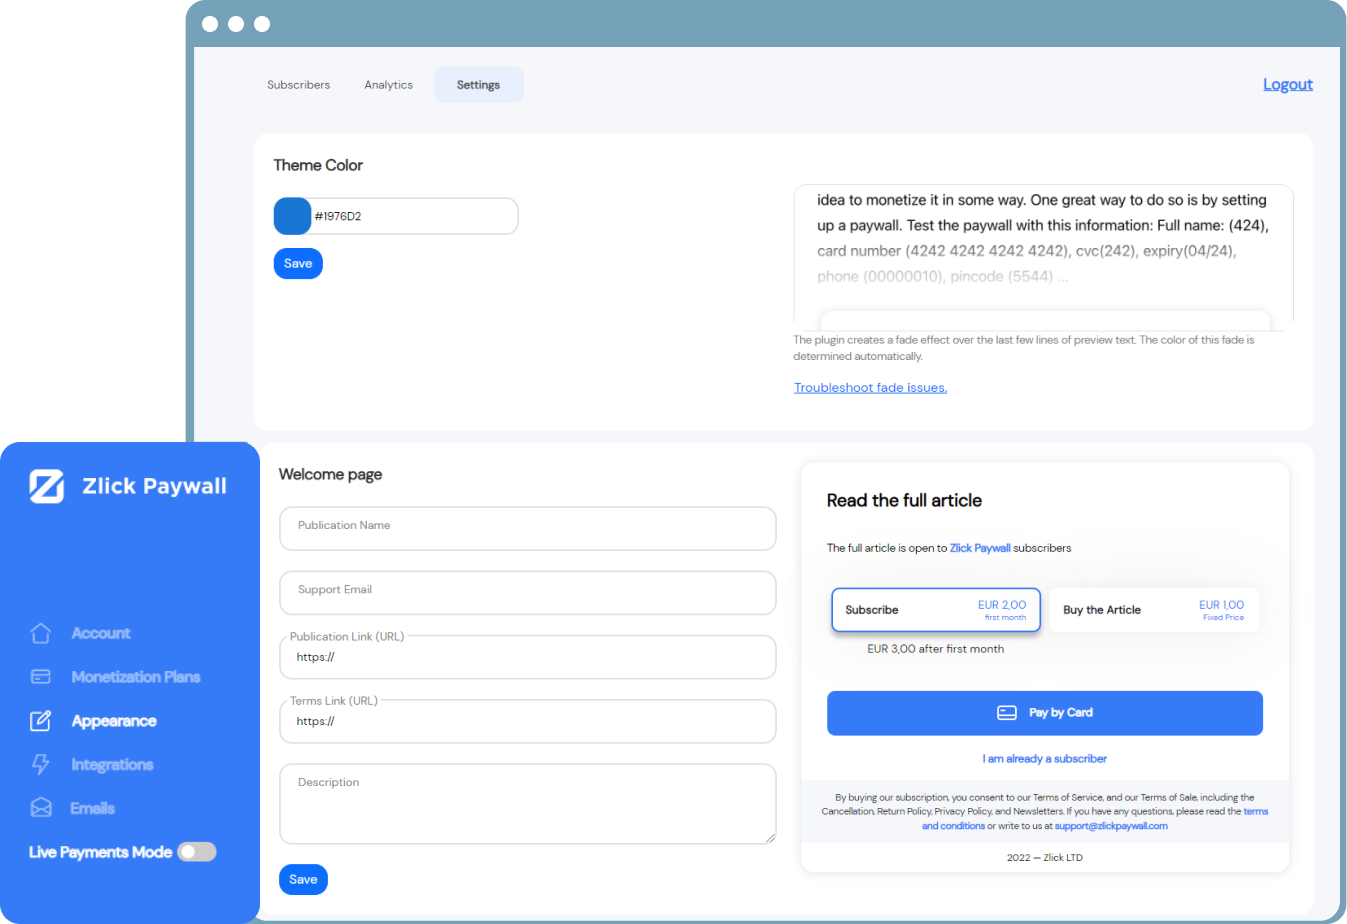
**You might as well configure your paywall while in there. Preview Paragraphs is the number of paragraphs a visitor can read before the paywall widget is shown. Search Engine Indexing is enabled by default but you can turn it off here if you wish.
**You might as well configure your paywall while in there. Preview Paragraphs is the number of paragraphs a visitor can read before the paywall widget is shown. Search Engine Indexing is enabled by default but you can turn it off here if you wish.
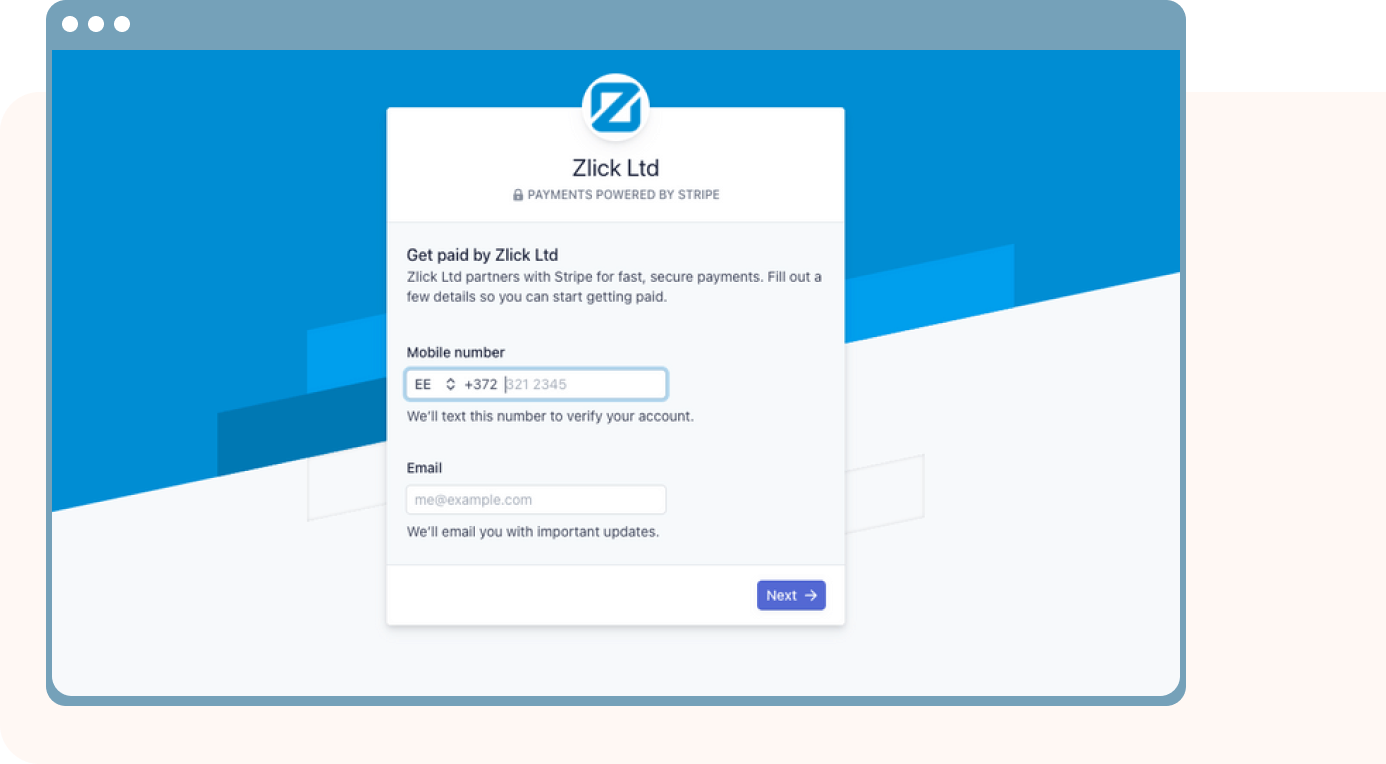
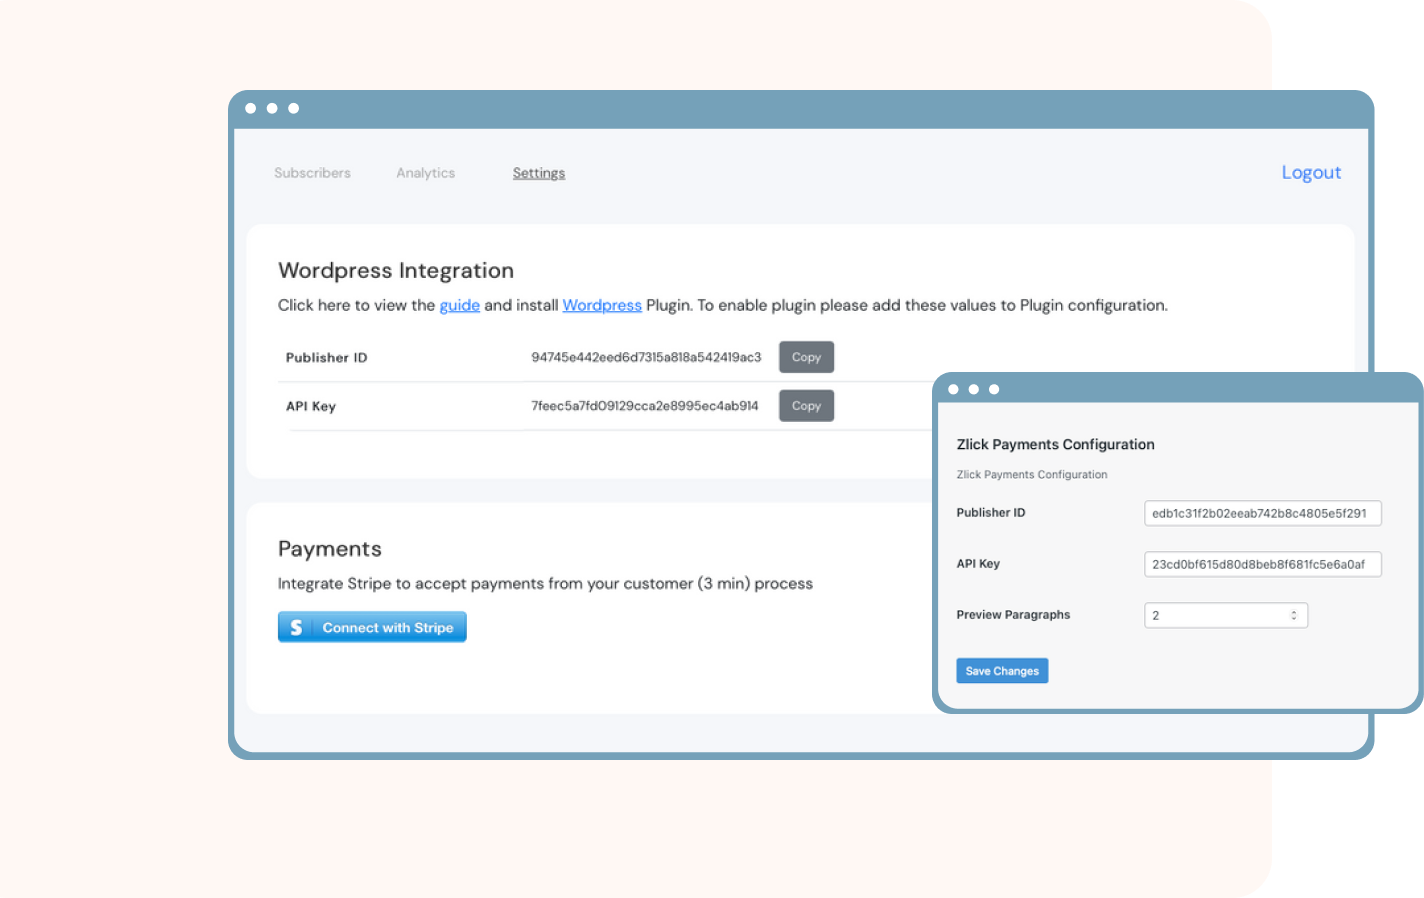
**Connecting with Stripe is 100% trusted and safe. They are the largest and most used platform for online transactions globally and that’s why we use them.
**Connecting with Stripe is 100% trusted and safe. They are the largest and most used platform for online transactions globally and that’s why we use them.

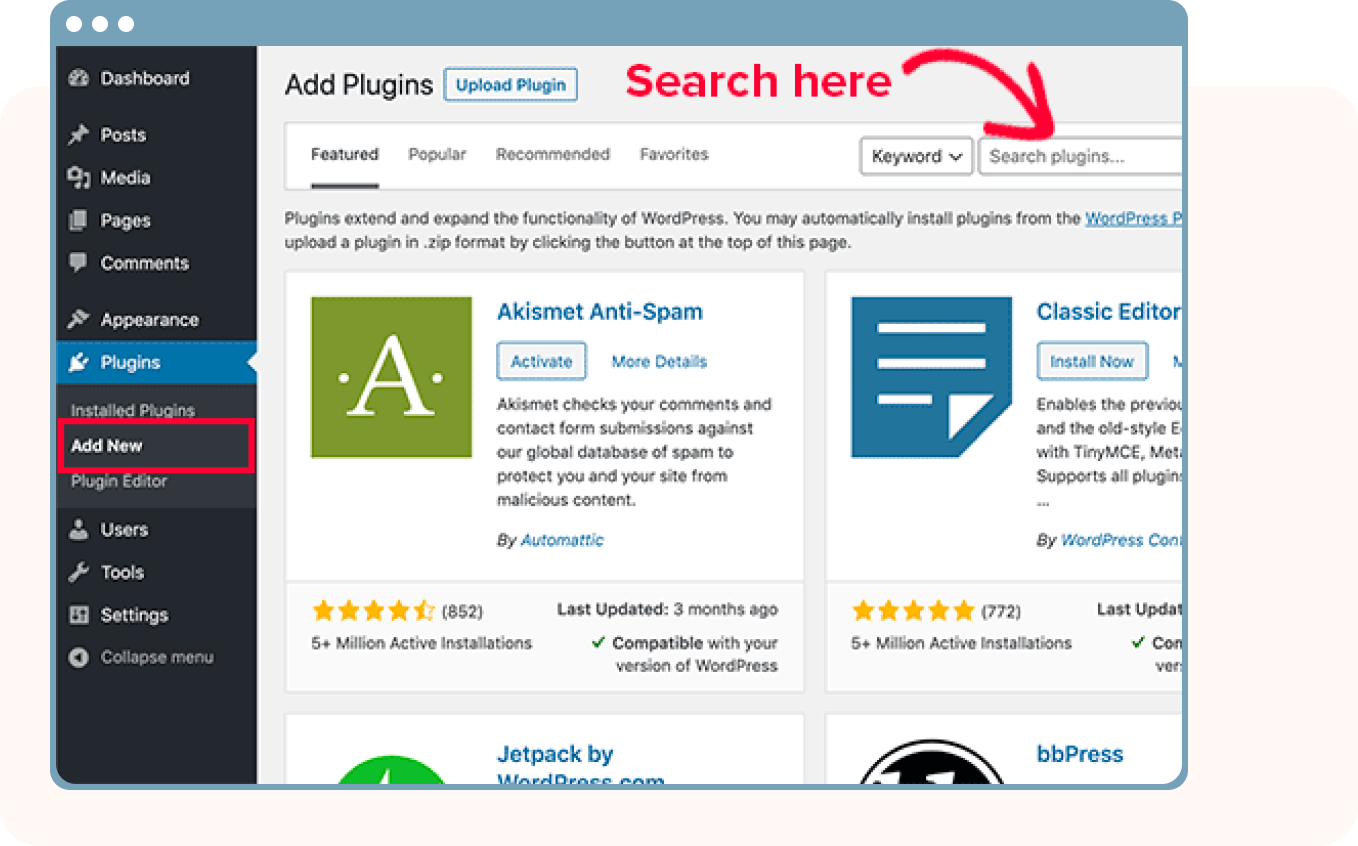
**You can also bulk edit the premium status of the articles, e.g. if you want to monetize hundreds of articles at once. Go to the “Posts” page and use the WordPress’ bulk edit tool to mark the required articles as paid or free.
**You can also bulk edit the premium status of the articles, e.g. if you want to monetize hundreds of articles at once. Go to the “Posts” page and use the WordPress’ bulk edit tool to mark the required articles as paid or free.
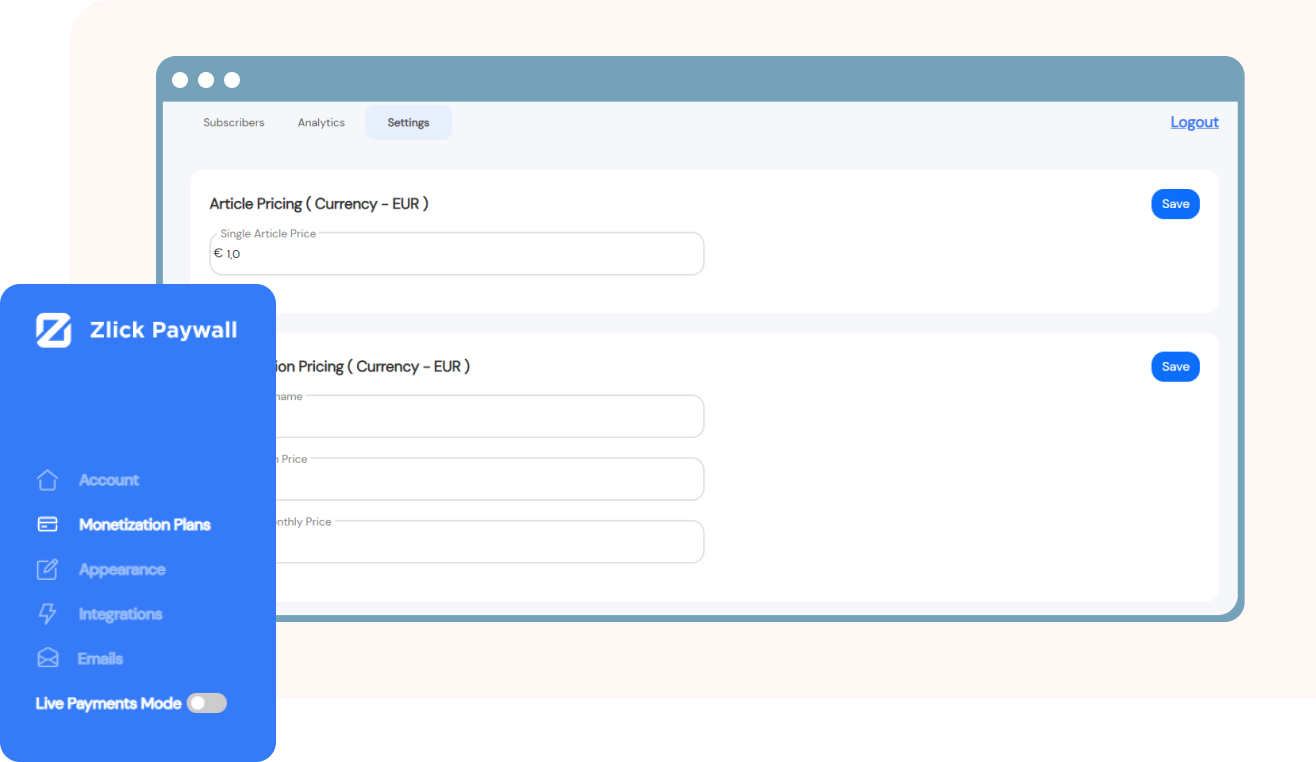
In Test Payments mode you can test with test credit card data: Name: any; Card number 4242 4242 4242 4242; CVC 242; Expiry 04/24.
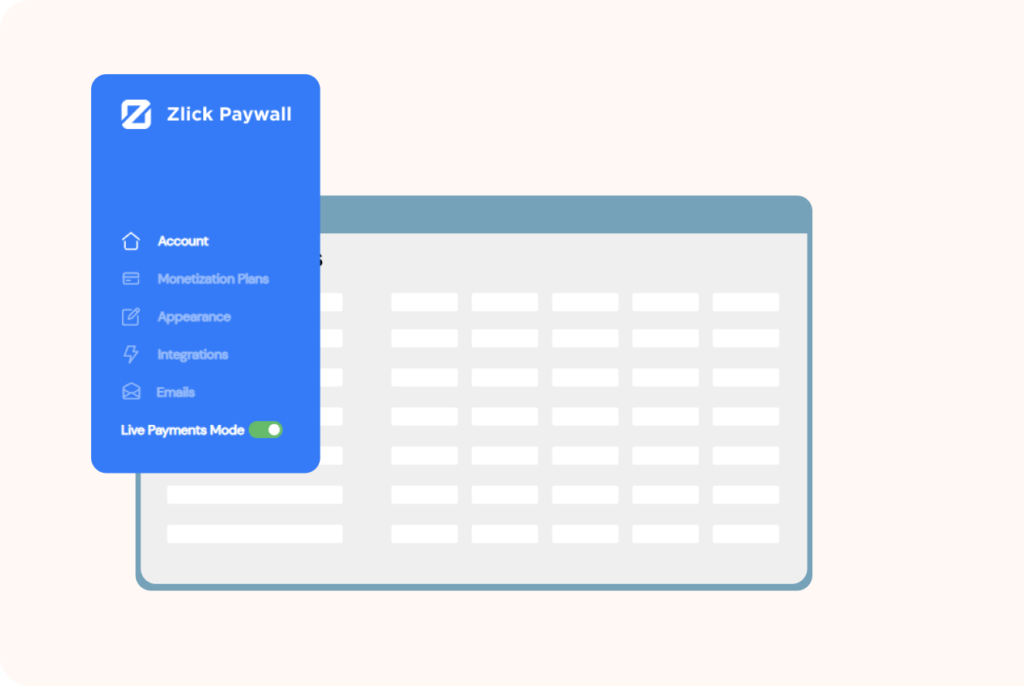
Once you are ready for Live payments:
In Test Payments mode you can test with test credit card data: Name: any; Card number 4242 4242 4242 4242; CVC 242; Expiry 04/24.
Once you are ready for Live payments:

**You can also bulk edit the premium status of the articles, e.g. if you want to monetize hundreds of articles at once. Go to the “Posts” page and use the WordPress’ bulk edit tool to mark the required articles as paid or free.
This only applies to you if you are using a cache plugin to speed up your site. A cache plugin could load a cached version of your content bringing issues for the paywall. Luckily, there’s a really quick fix for this.
*No credit card required
Zlick Ltd
52 Grosvenor Gardens,
London, United Kingdom, SW1W 0AU
reg nr: 09453485
VAT: GB263389086
support@zlick.it
Zlick Ltd © 2025